
Windows Server / AD Controller
How to setup Control D on a Windows server / AD domain controller
Overview
"I sure can't wait to make changes to my domain controller" - nobody, ever.
Managing Windows servers can be challenging, so let's make this as simple as possible. There are two ways to deploy Control D on your Windows DNS Server / AD domain controller.
Legacy DNS
This method requires no software to install, and is quite easy. Simply create a Windows Server Device, and be sure to toggle the Legacy Resolver option. Once you have your DNS resolver IP addresses, simply set them as forwarders in the DNS Manager.
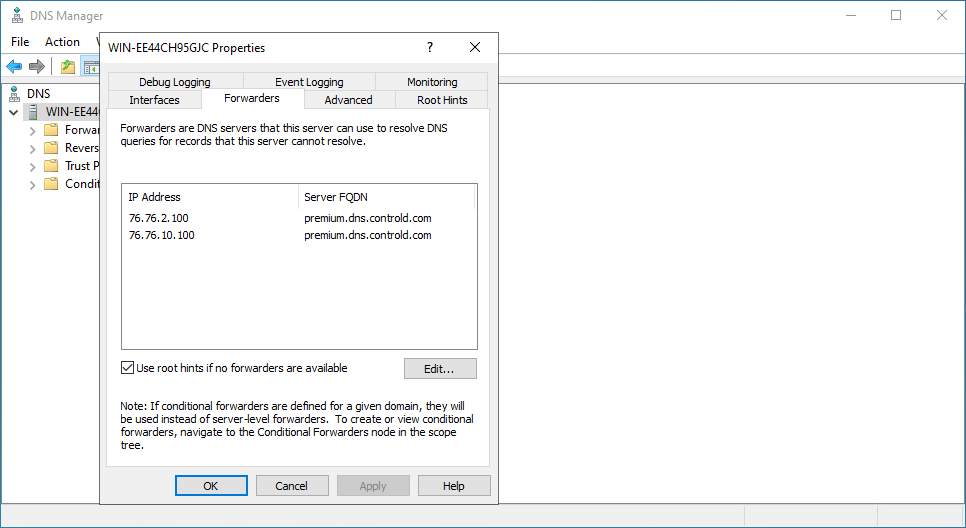
The above IPs are just for example, yours will be different.
That's pretty much it. As long as the source IP of your network is known to Control D, everything should just work now.
Keep in mind, you're still use Legacy DNS, which is not encrypted and you also miss out on some unique features of Control D. If you want to leverage modern DNS protocols and features, see the next method.
Secure DNS
This method requires the installation of our Command Line Daemon. This is not as scary as it sounds, and is quite literally a single command. Simply create a Windows Server Device, and click on Automatic Setup button.
Windows Server 2019+You must have at least the 2019 version of Windows Server installed. 2016 and earlier are not supported.
You will see multiple methods of installation, the one you want is the batch command.

Copy this command and paste it into cmd. You will see something like this.
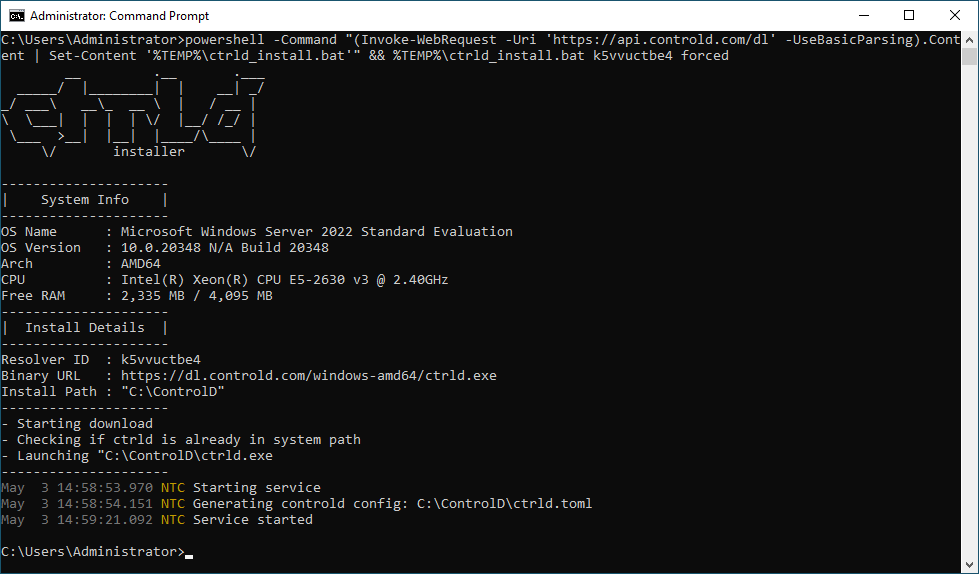
Here is what happened:
- A script is downloaded and executed
- Script detects the correct arch and downloads the
ctrld.exebinary intoC:/ControlDdirectory ctrld.exeis added to system path, so you can call it from any (new) terminal.- System service is added and started, which spawns a localhost DNS listener
- ctrld configures the listener as a forwarder in Windows DNS
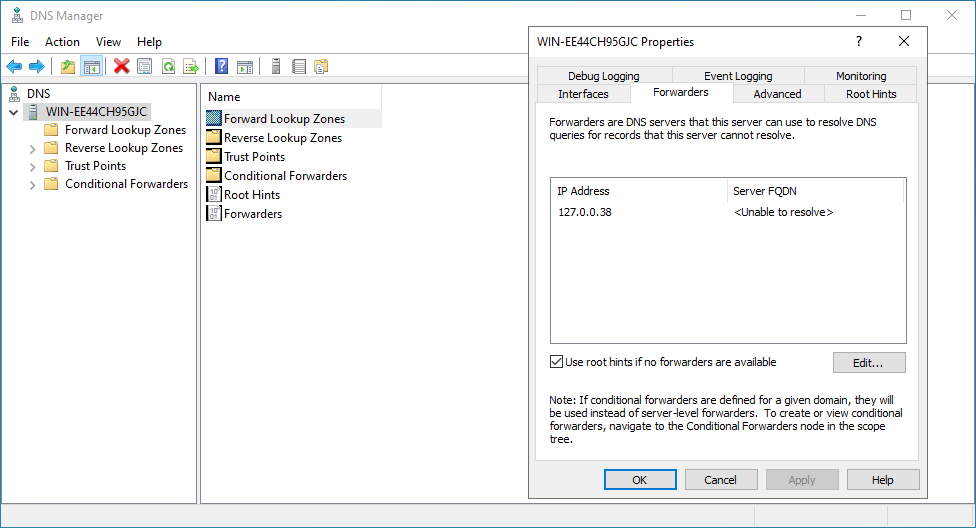
You're (almost) done here. See Active Directory Integration Guide for more relevant material if you want your local domains to still exist (it will be painless, we promise).
Updated 9 months ago