
ASUS Router Guide
DNS DaemonThis router is supported by the ctrld Command Line Daemon. This is the best and simplest way to onboard.
ASUS Routers
If you have an ASUS router, you will most likely be using one of two different firmware versions:
- The factory default ASUS router firmware which currently only supports Legacy DNS
- Or a more advanced firmware called ASUS Merlin which has options for both Legacy DNS as well as the more modern and secure DNS-over-TLS
The Legacy DNS setup is the same for both firmware versions and the steps can be found below.
If you have ASUS Merlin firmware and want to use DNS-over-TLS, then scroll down or click here to find the instructions on how to set that up.
Legacy DNS
Follow the steps below to configure the Legacy DNS IP on your ASUS router.
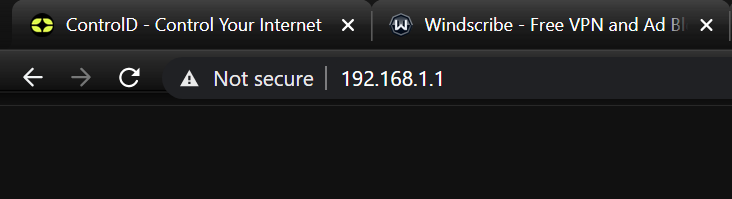
Step 1
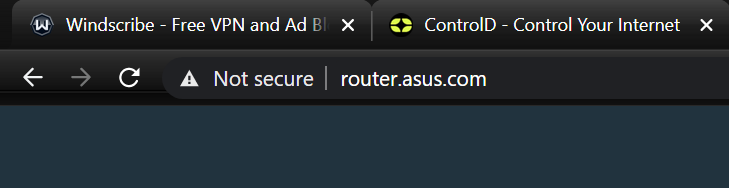
Open the ASUS router interface by navigating to it in your browser. You can reach it via router.asus.com or 192.168.1.1

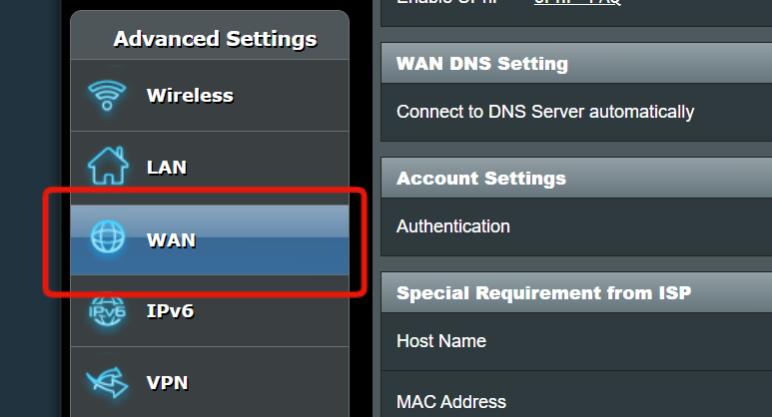
Step 2
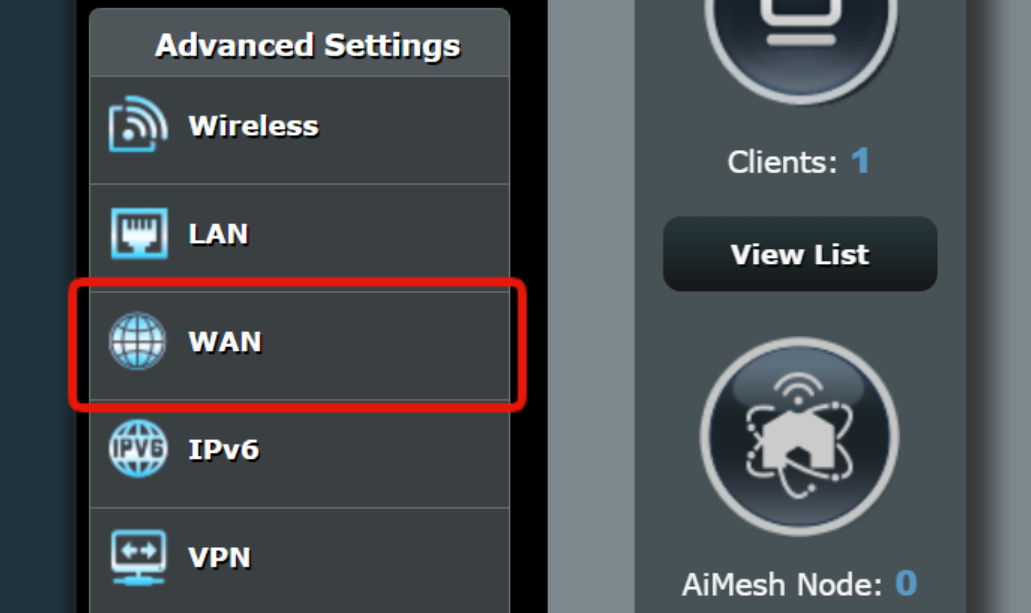
Navigate to the WAN section in the Advanced Settings sidebar.
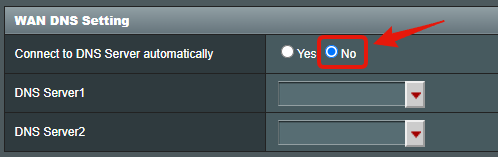
Step 3
Next, change the “Connect to DNS Server automatically” option No. Once you do that, you will see two DNS Server fields appear.
Step 4
Now determine which DNS resolver you want to use.
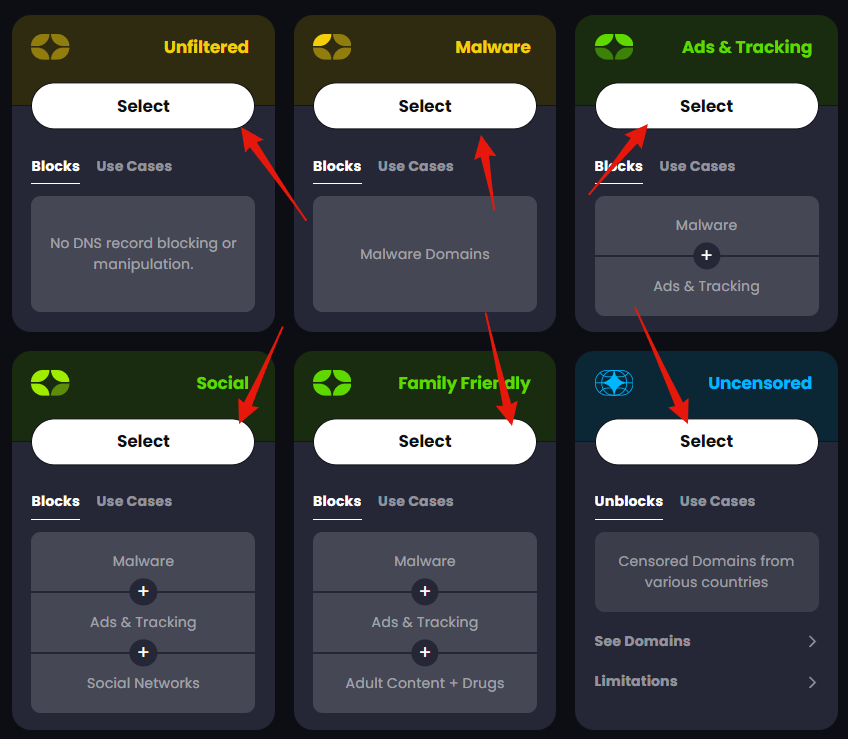
Free Resolver
If you are configuring our free DNS resolvers, you can get the IPs from this page: https://controld.com/free-dns
-
Select the configuration you want to use from the list:
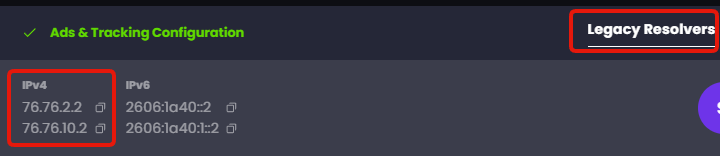
-
Then copy the Legacy Resolver IP address that appears at the bottom of the page:
Custom Resolver
If you are configuring a custom Legacy DNS resolver:
-
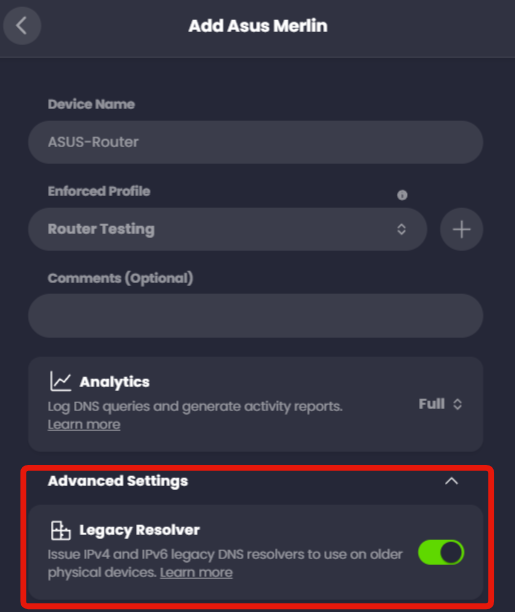
Create a new ASUS Merlin Router Device on your Control D Dashboard. Link it to a Profile (or create a new Profile if you don't have one) and finally make sure to enable the Legacy Resolver option under Advanced Settings. Then press Add Device:
-
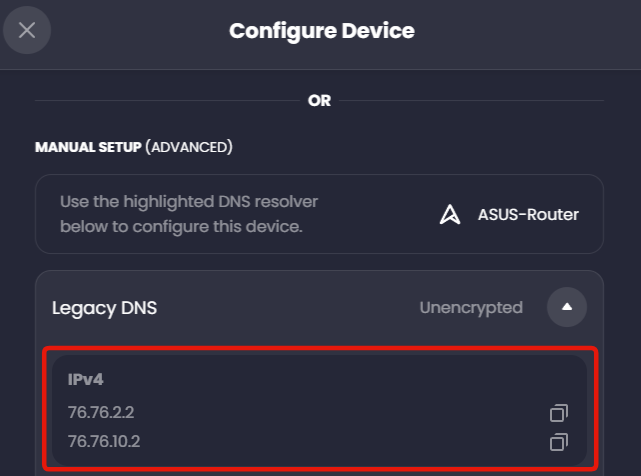
Expand the Legacy DNS section where you will see the IP addresses to use for the setup. Do NOT copy the same IPs from the screenshot, copy the ones from your account specifically.
Step 5
The router will use DNS Server 1 for resolving queries, then DNS Server 2 as a backup.
Once you have selected the DNS IP you want to use, you can both of them into the Static DNS fields.

Step 6
Finally, scroll to the bottom of the page and press Apply.

Once the router saves the configuration, you are using Control D on your network!
Keep in mind that if you configure a custom DNS on any of the individual devices connected to this router, those devices will not be using the DNS you configured here.
Dynamic IP WarningThis method is subject to your source IP being registered on this Device in the web control panel, so this is best suited for networks with a static IP. If you have a Dynamic IP see Legacy DNS limitations section for solution.
DNS-over-TLS (DoT)
DNS-over-TLS offers more security than the Legacy DNS approach but at the moment it is only available on the ASUS Merlin firmware which must be manually installed on the router.
You can check if you have the Merlin firmware at the top of the ASUS router interface:
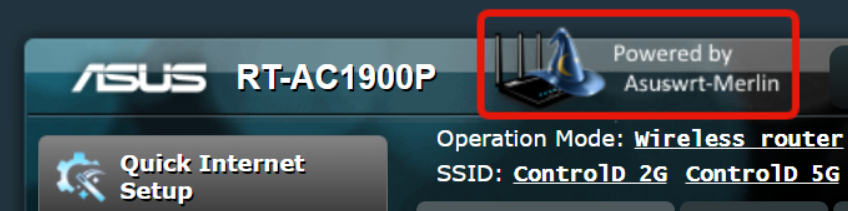
If you see that Merlin badge then follow the steps below to configure DNS-over-TLS on your router.
Step 1
Open the ASUS router interface by navigating to it in your browser. You can reach it via router.asus.com or 192.168.1.1

Step 2
Navigate to the WAN section in the Advanced Settings sidebar.
Step 3
Next, under the "WAN DNS Setting", press Assign.

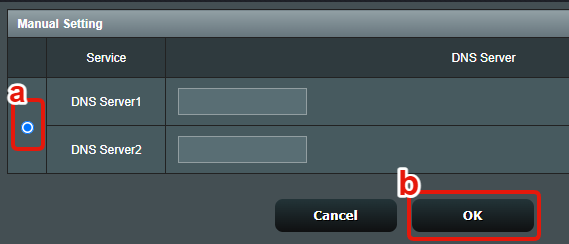
Scroll down to the bottom of the list and select the "Manual Setting" option. Leave the DNS Server fields blank and press OK.
Step 4
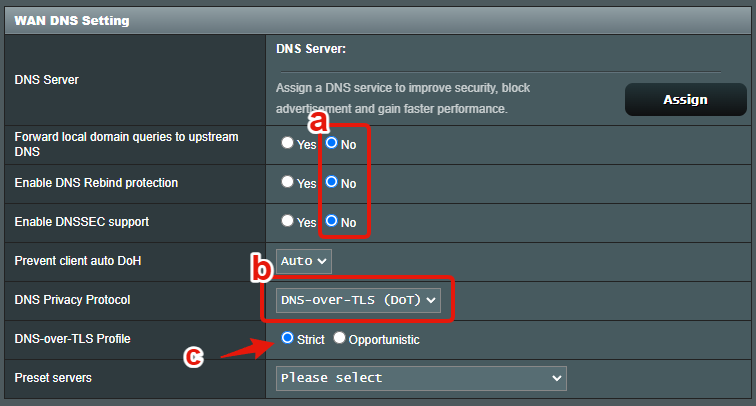
You will now need to configure the options for our DoT setup:
- a. Set the Forward local queries, Enable DNS Rebind and Enable DNSSEC options to all be NO
- b. Change DNS Privacy Protocol to DNS-over-TLS (DoT)
- c. Make sure the DNS-over-TLS Profile is set to Strict
Step 5
Now you'll need to fetch your account's DNS resolvers, you can find your custom DNS details in the Manage Profiles and Devices section. Best thing to do, is create a new Asus Router Device, which will generate unique resolvers for it.
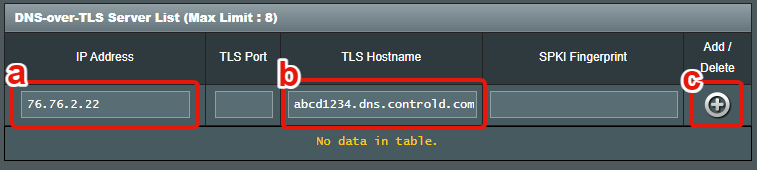
Step 6
Below the DNS options in the router interface, you'll see the fields to enter your DNS details:
- a. For the IP Address field, enter
76.76.2.22(if using Premium resolver) or76.76.2.11(if using Free resolver) - b. In the TLS Hostname field, enter the DNS-over-TLS hostname for the device you just created.
- c. Finally, press the plus (+) button on the right to add this resolver to the list.
Step 7
Once you've added the DNS resolver to the list, scroll to the bottom of the page and press Apply.
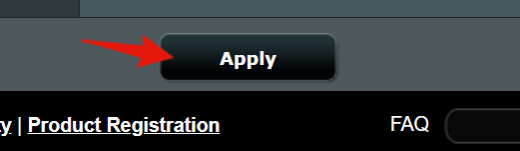
After the router saves the configuration, you are using Control D on your network!
Keep in mind that if you configure a custom DNS on any of the individual devices connected to this router, those devices will not be using the DNS you configured here.
Updated 9 months ago