Atera RMM Tutorial
How to setup Control D using Atera RMM
Install
Create Provisioning Code
First thing you have to do is create a Provisioning code in the Control D Dashboard. Go to Provision, and click the + button. Fill out the form, and you should see an install command as well as a button to Download Install Script.
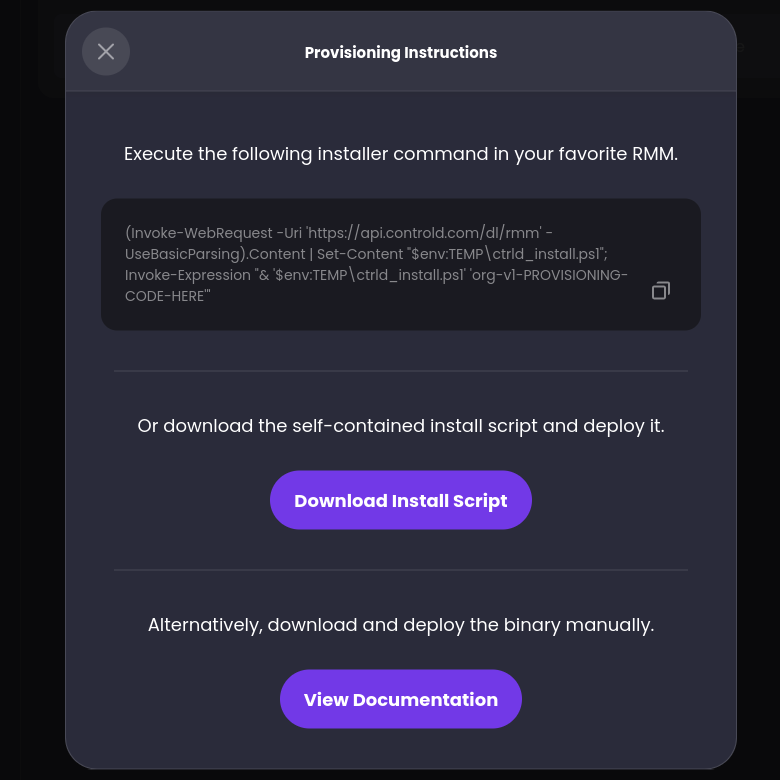
Expiry Time and LimitBe sure to select the appropriate expiry time and execution limit for the Provisioning code. When this time passes, or the limit is reached, the code will become invalid and cannot be used anymore to provision new Endpoints. Same applies if you delete this code.
Create a Deployment Script
- From the Atera UI navigate to
Newin the top left corner and chooseScript.
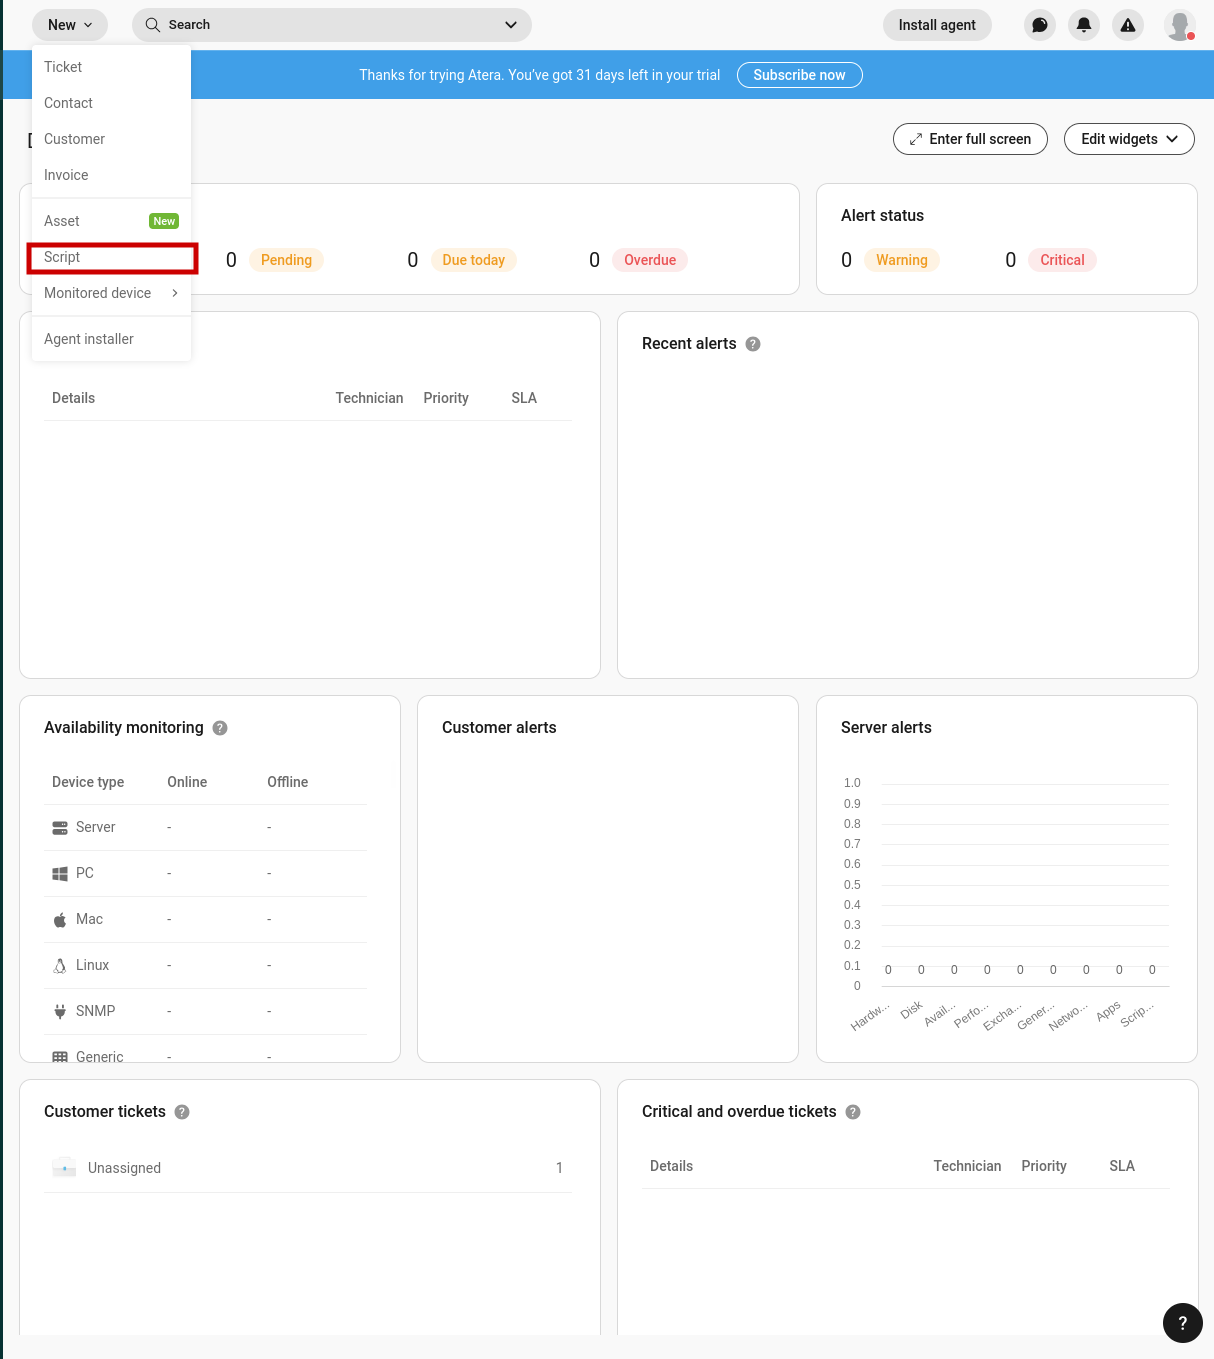
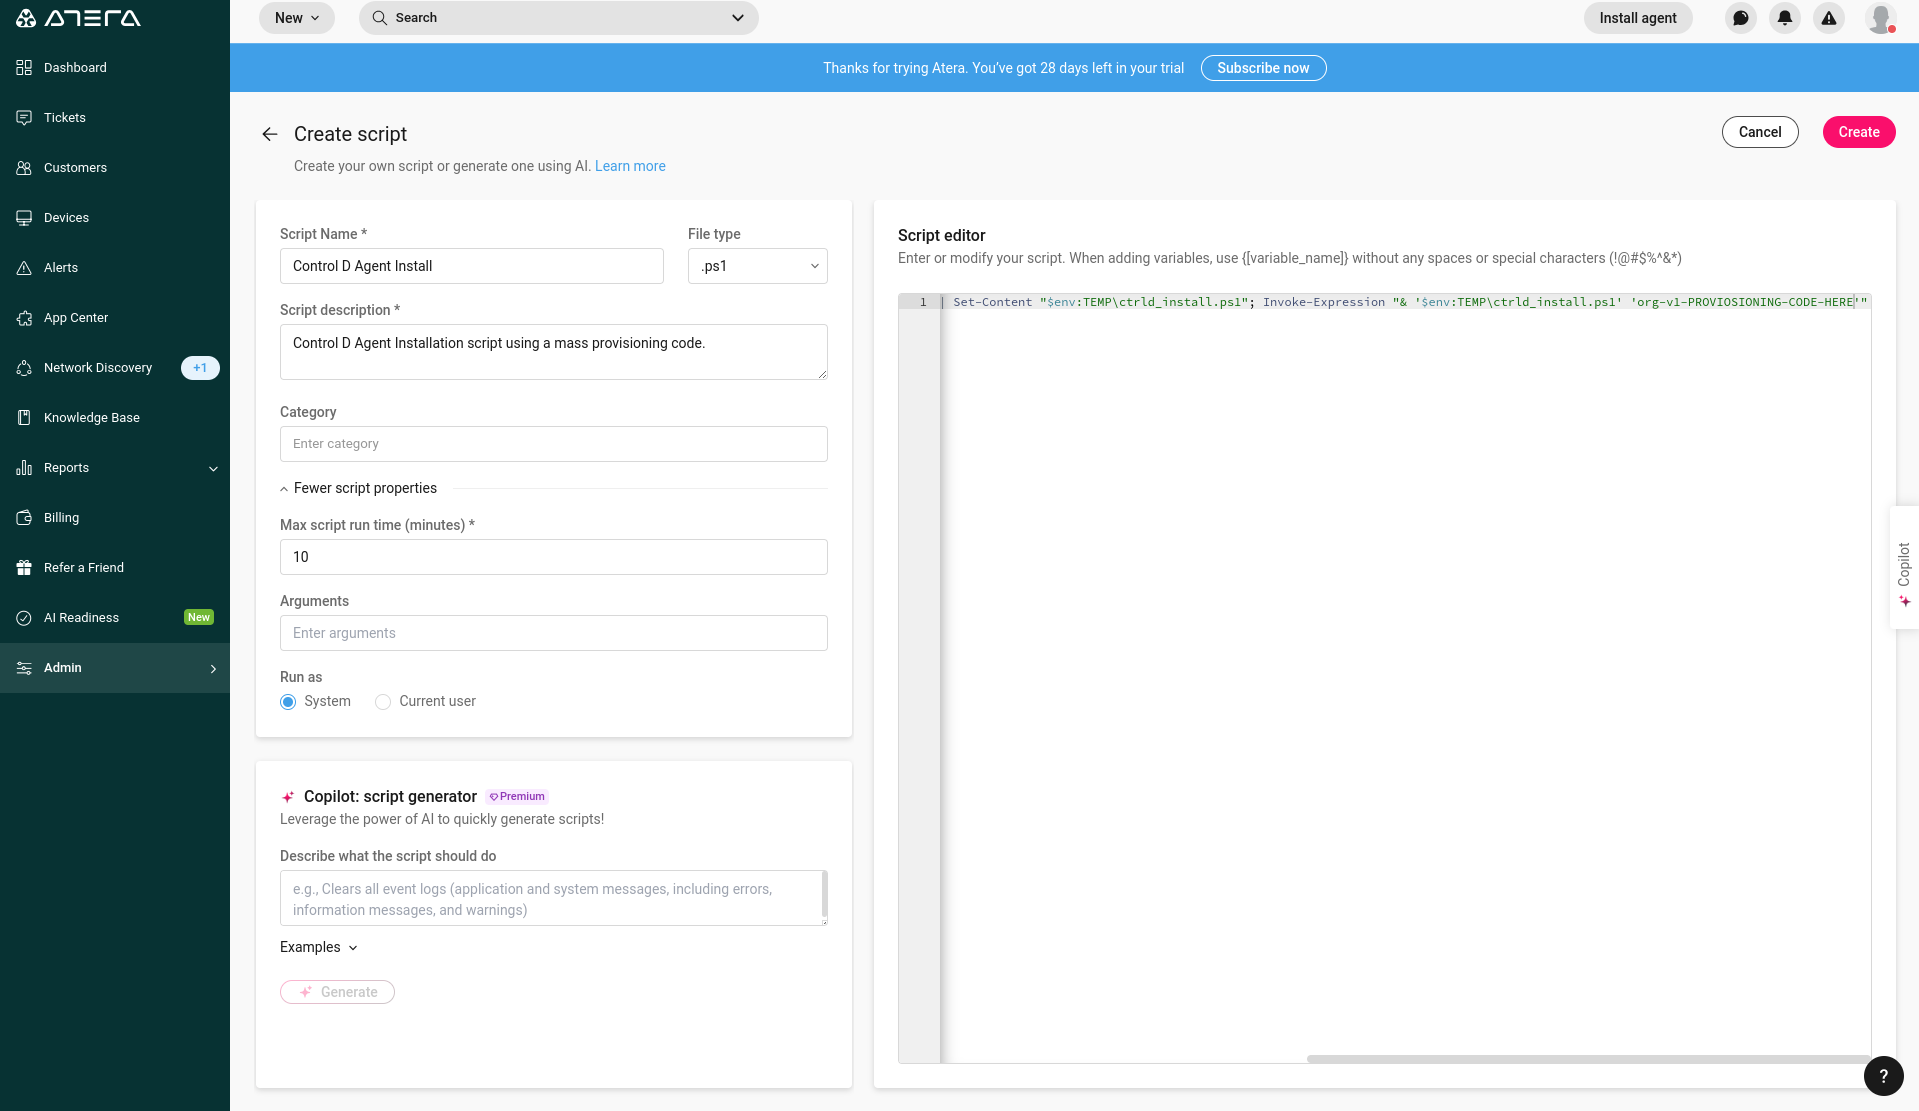
- Fill out the required fields as you see fit.
PermissionsBe sure you've selected System for the
Run Asoption.
-
Paste the Provisioning Script you created in the previous step OR upload the script you downloaded.
-
Save & Exit.
Create Upgrade Script (Optional)
- Create a new PowerShell script with the following:
ctrld upgradeCreate Removal Script (Optional)
- Create a new PowerShell script with the following:
ctrld uninstall -vvDeploying to Windows Endpoints
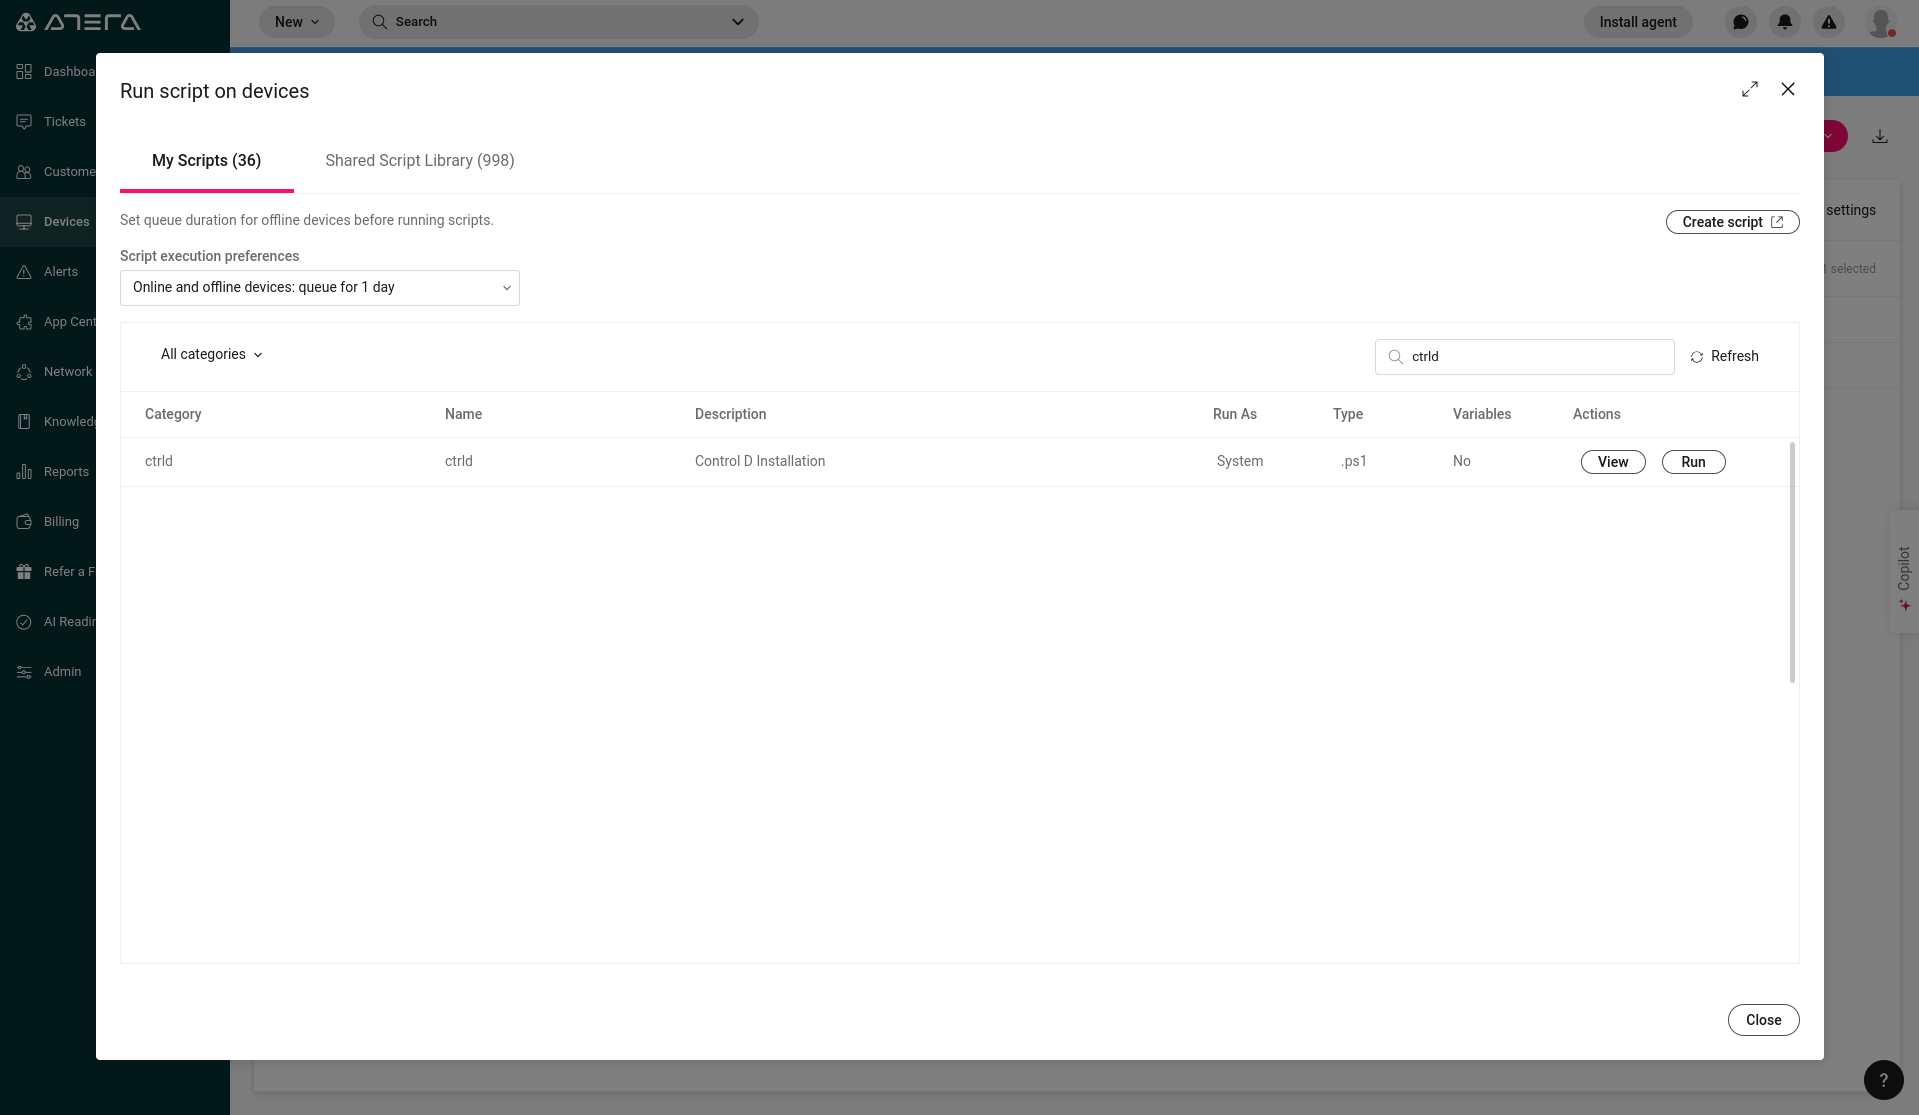
- From the
Devicestab - select the endpoints you plan on deploying to and chooseRun Script. - Choose your Installation Script and adjust your Script Execution Preferences.
- Run the script.
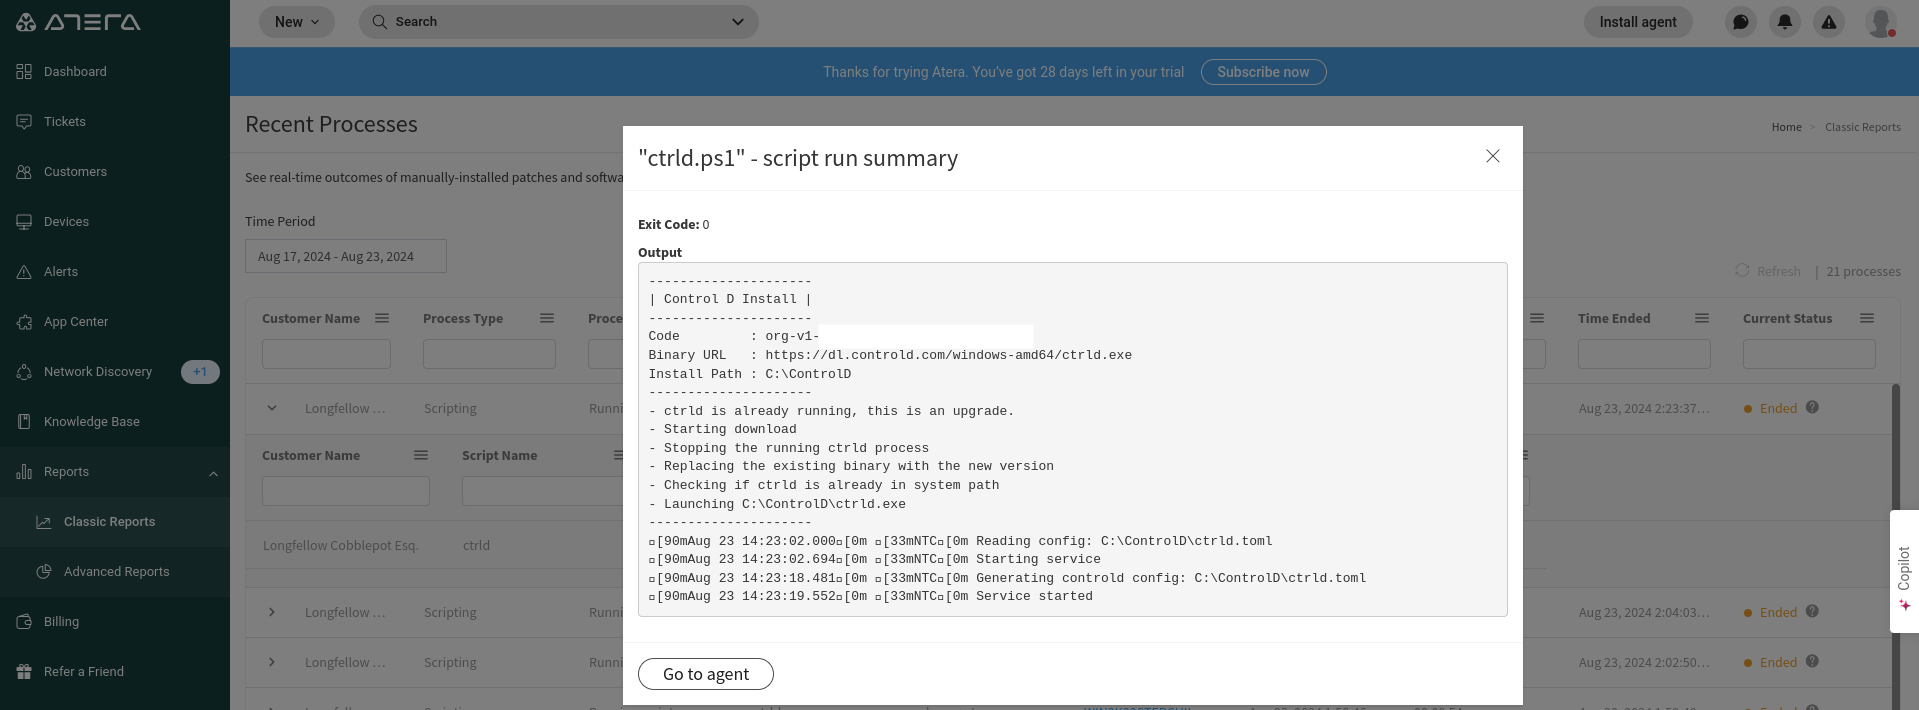
- View the progress of your deployment by navigating to
Reports --> Classic Reports --> Recent Processesor by viewing an individual endpoint page.
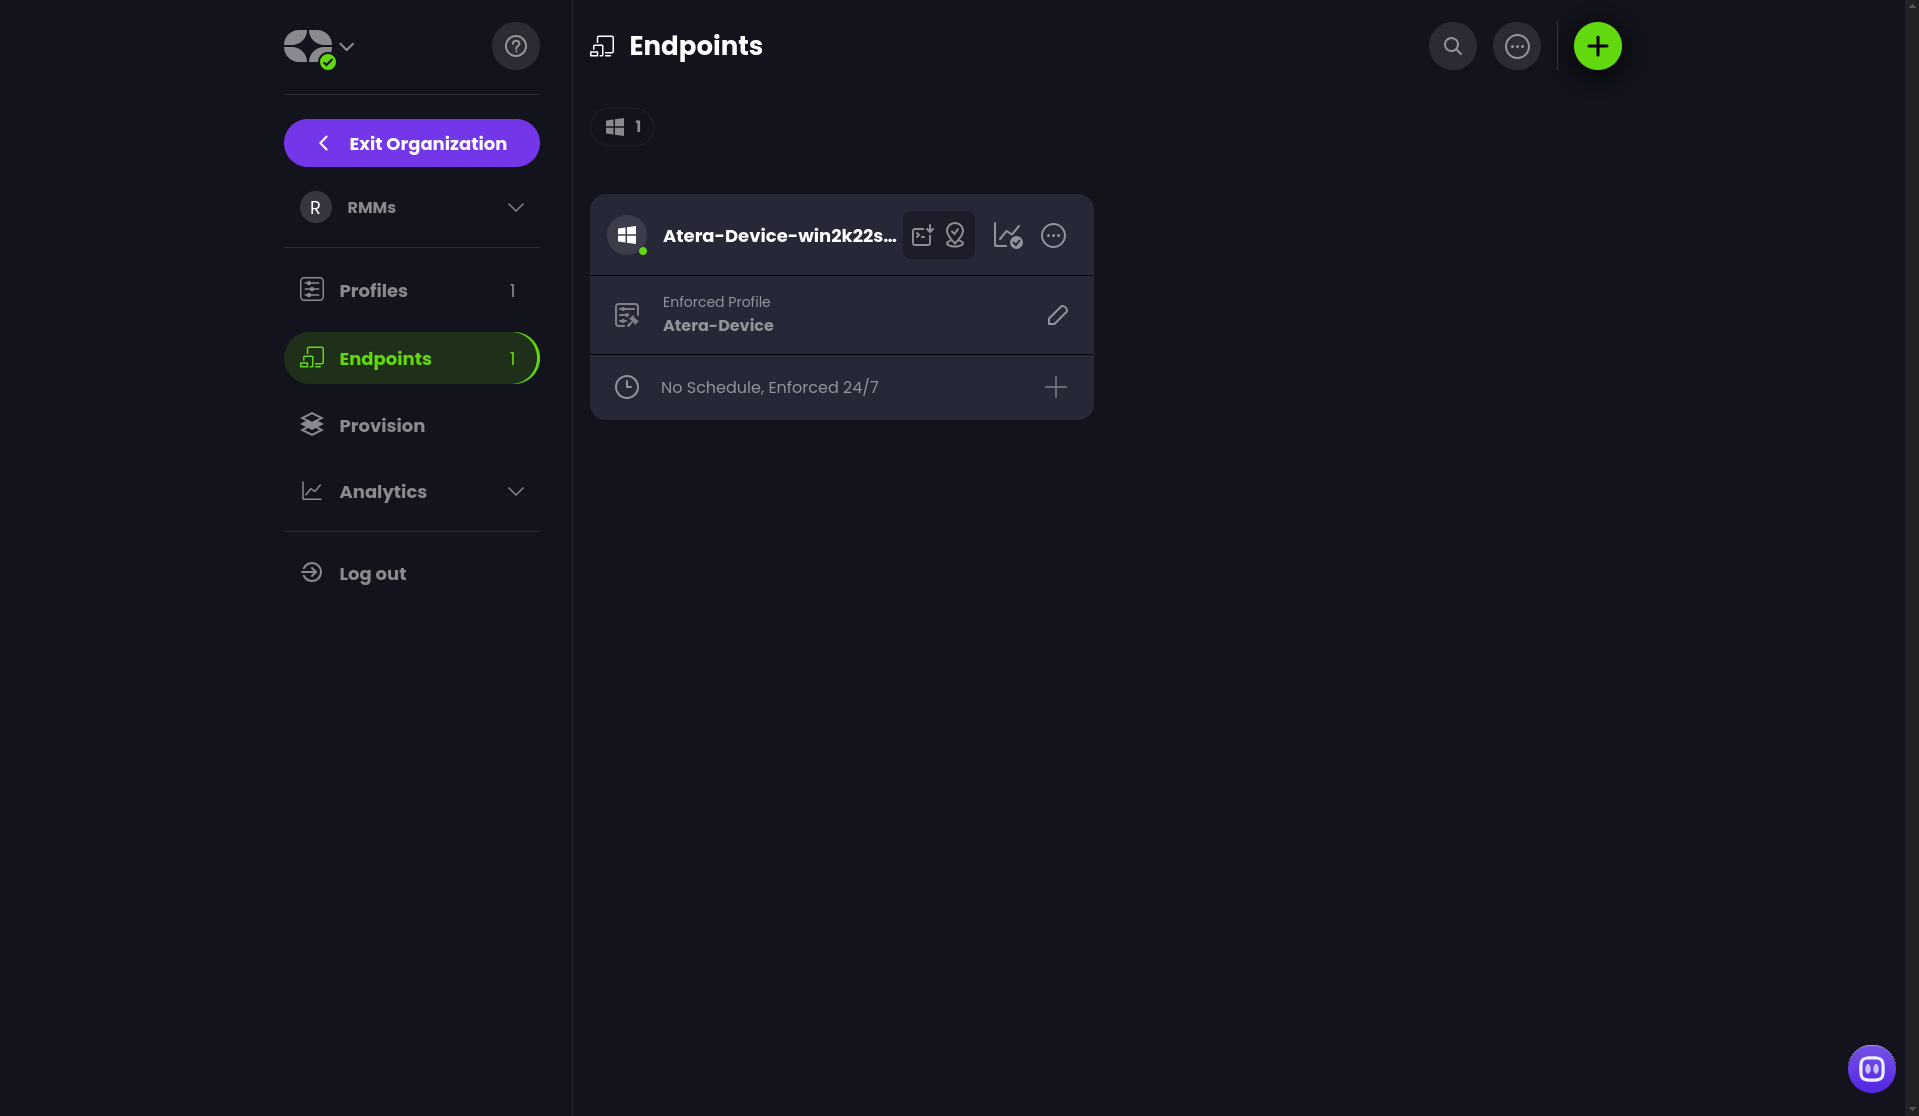
Once your deployment is finished - you should see your Endpoints in the Control D Dashboard.
Deploying to MacOS and Linux Endpoints
MacOS and Linux follow a similar setup method, instead deploying a shell script in place of PowerShell.
- After creating a provisioning code - copy the 1-liner provisioning command or download the script.
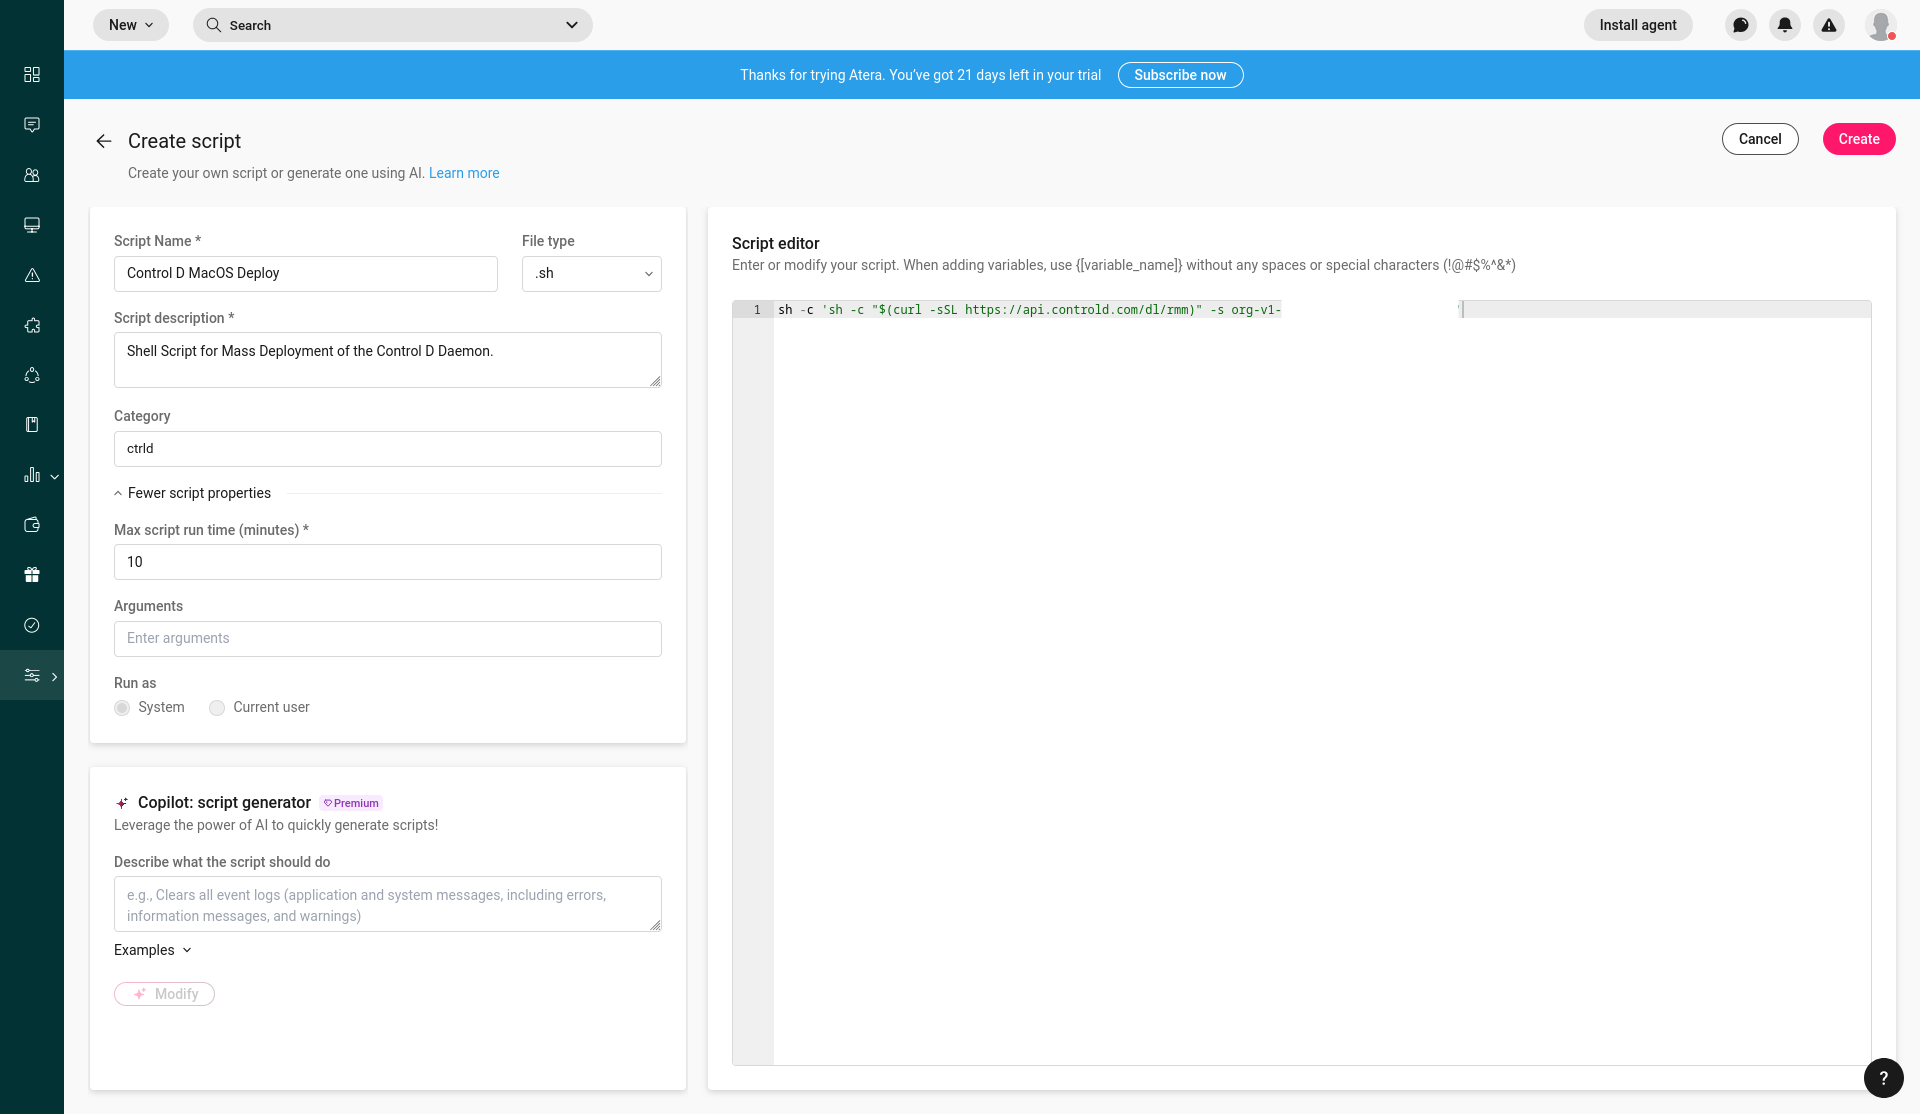
- From the Atera Dashboard - Create a new script.
- Paste the 1-liner provisioning script or upload the full script you downloaded.
Create Upgrade Script (Optional)
- Create a new shell script with the following:
ctrld upgradeCreate Removal Script (Optional)
- Create a new PowerShell script with the following:
ctrld uninstall -vvUpdated 3 months ago