DD-WRT Router Guide
DNS DaemonThis router is supported by the ctrld Command Line Daemon. This is the best and simplest way to onboard.
Legacy DNS
Keep in mind that you can only setup Legacy DNS in the DD-WRT interface. To use Secure DNS, click here and follow these steps instead.
Step 1
Open the router interface by navigating to it in your browser. By default you can reach it via 192.168.1.1

Step 2
Navigate to the Setup tab followed by the Basic Setup section.
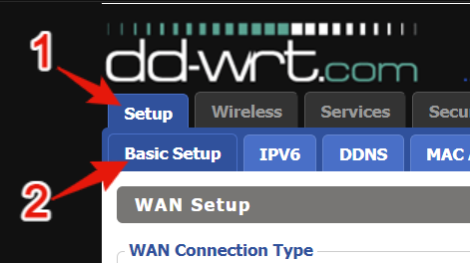
Step 3
Now determine which DNS resolver you want to use.
Free Resolver
If you are configuring our free DNS resolvers, you can get the IPs from this page: https://controld.com/free-dns
-
Select the configuration you want to use from the list:
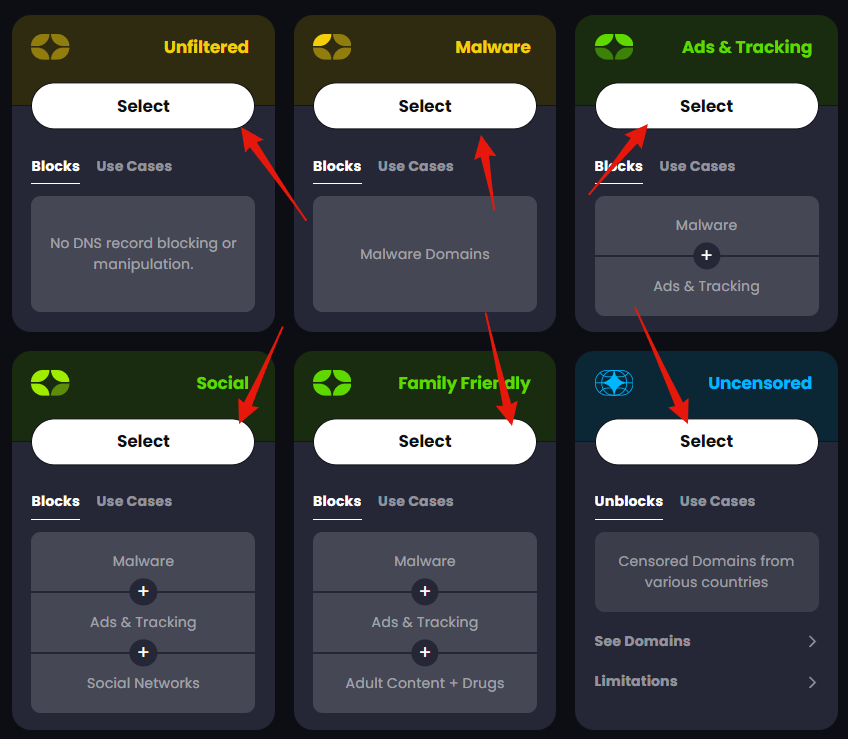
-
Then copy the Legacy Resolver IP address that appears at the bottom of the page:

Custom Resolver
If you are configuring a custom Legacy DNS resolver:
-
Create a new "DD-WRT" Router Device on your Control D Dashboard. Link it to a Profile (or create a new Profile if you don't have one) and finally make sure to enable the Legacy Resolver option under Advanced Settings. Then press Add Device:
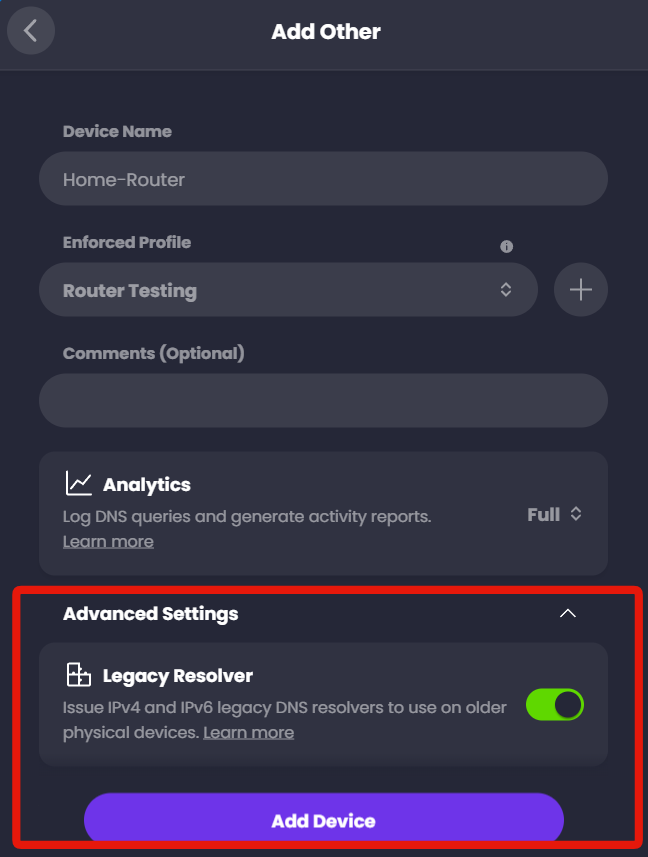
-
Expand the Legacy DNS section where you will see the IP addresses to use for the setup. Do NOT copy the same IPs from the screenshot, copy the ones from your account specifically.
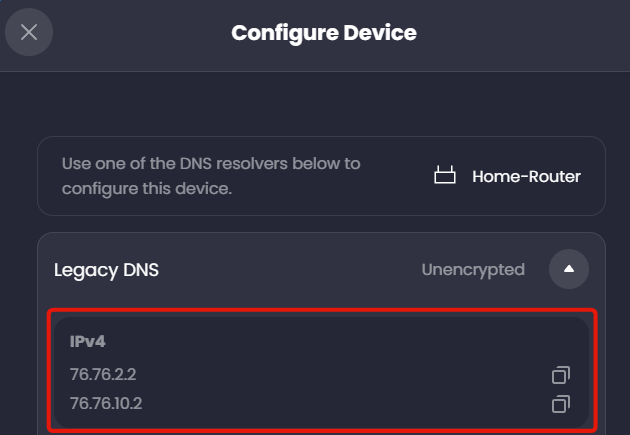
Step 4
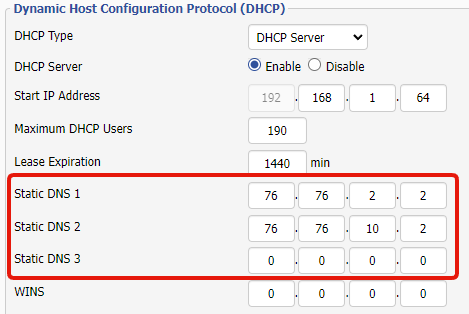
Back in the DD-WRT interface, scroll down to the section containing the Static DNS fields. DD-WRT allows you to configure 3 DNS resolvers, we will use the two from the last step and leave the third blank.
Enter the resolver IPs from the last step into the Static DNS 1 and Static DNS 2 fields.
Step 5
Finally, scroll to the bottom of the page and press Apply Settings.

Once the router saves the configuration, you are using Control D on your network!
Keep in mind that if you configure a custom DNS on any of the individual devices connected to this router, those devices will not be using the DNS you configured here.
Dynamic IP WarningThis method is subject to your source IP being registered on this Device in the web control panel, so this is best suited for networks with a static IP. If you have a Dynamic IP see Legacy DNS limitations section for solution.
Secure Resolver (DNS-over-HTTPS)
Setting up a secure DOH resolver on your router will require you to SSH into it and run a one-line command to install the ctrld utility. You will first need to enable some settings on the router to allow this though.
Step 1
Open the router interface by navigating to it in your browser. By default you can reach it via 192.168.1.1

Step 2
Now follow these steps to enable remote SSH access and JFFS2 Support in the router interface. These are necessary to run the ctrld installation command on the router.
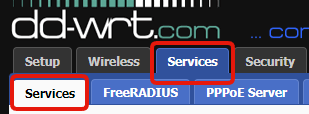
- Head to Services at the top, and then Services again.
- Scroll down to the Secure Shell (SSH) section and use the following settings:
Enable Daemon: Enable
SSH TCP Forwarding: Disable
Password Login: Enable
Port: 22

- Press Apply Settings.

- Now head to Administration at the top, followed by Management.

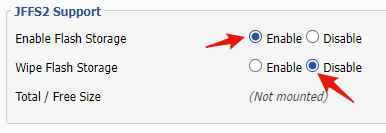
- Scroll down to the JFFS2 Support section and Enable Flash Storage. Keep the other option disabled.
- Press Apply Settings and once they are saved, press Reboot Router.


Step 3
After the router has restarted, you should now be able to SSH into it.
Open Command Prompt (on Windows) or Terminal (on MacOS or Linux).
Now remotely connect to the router with SSH using the root account and the Gateway IP. This is the IP that you used in the browser to access the router interface, usually 192.168.1.1 but if your gateway is different, use that one instead.
The command will look like this ssh [email protected]
You will be prompted for a password which is the router admin password, the same one you use to access the web interface. Type it in (you will not see any characters appear when typing the password) and press Enter.

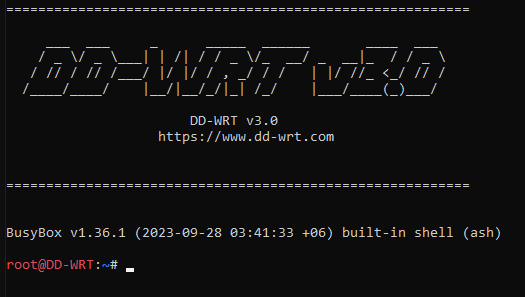
Once you are logged in, you will see the following in your Command Prompt/Terminal window:
Step 4
Now you'll need to create a new Device for your router in the Control D Dashboard.
- Log into the Dashboard with your Control D account and go to the Devices section.
- Press the Green plus ( + ) button in the top-right.

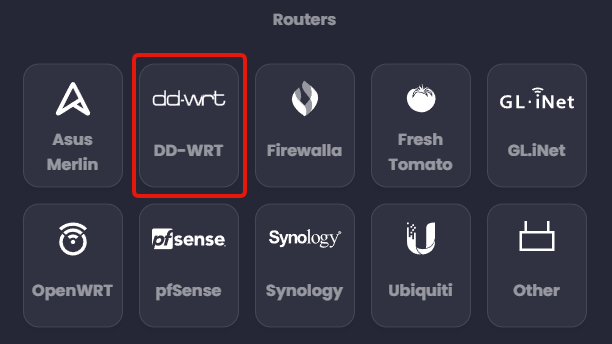
- Select DD-WRT under the Routers section.
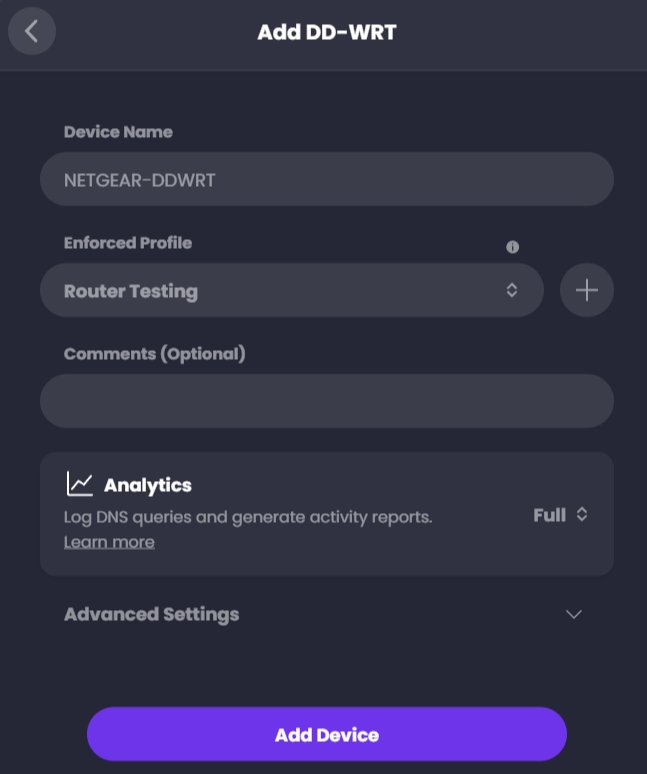
- Give your device a name and link it to a Profile (create a new Profile if you don't have one). Add any optional comments and enable Analytics if you want them. Then press Add Device.
- Next, click the Automatic Setup option which will show you the one-line command to install the ctrld utility.

- Click the Copy button on the right side to copy the command to the clipboard.

Step 5
Finally, go back to your Command Prompt/Terminal window where you are SSHed into the router, paste the command and press Enter to run it.

The router will then download and install the ctrld utility. Once it's installed, the ctrl utility will automatically start.
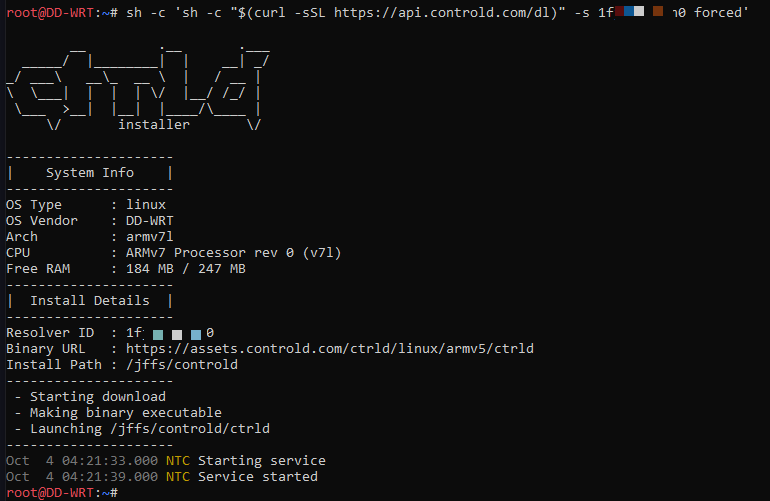
Once you see the Service Started message, you are done! Your router is now using your Secure DoH resolver.
If you want to execute ctrld commands on the router, first navigate to the folder it is installed in with this command:
cd /jffs/controld
And then execute commands using ./ctrld. For example to see a help overview, run the command like this:
./ctrld --help
For more documentation, including the different ctrld modes, commands and uninstall instructions, refer to the main ctrld Utility docs here.
Updated 3 months ago