
NETGEAR Router Guide
Legacy DNS
Follow the steps below to configure Control D on your NETGEAR router.
Keep in mind that NETGEAR routers use legacy DNS at the moment.
Step 1
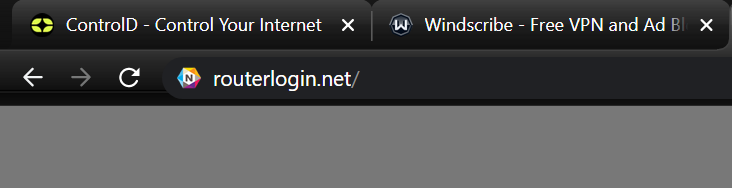
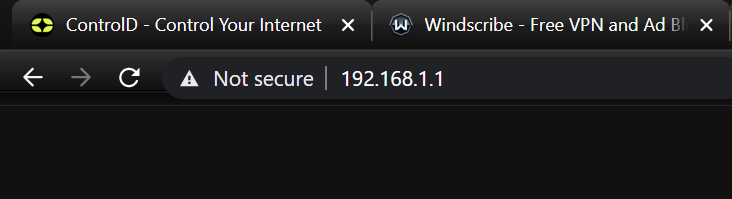
Open the NETGEAR router interface by navigating to it in your browser. You can reach it via routerlogin.net or 192.168.1.1.
Step 2
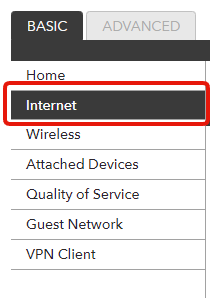
Navigate to the Internet section in the sidebar.
Step 3
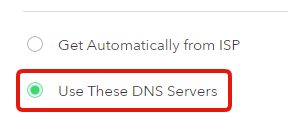
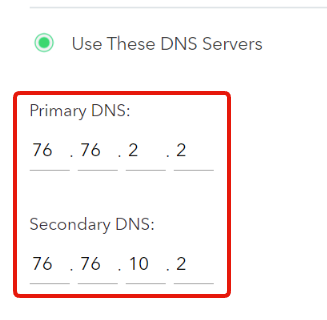
Next, enable the "Use These DNS Servers" option.
Step 4
Now determine which DNS resolver you want to use.
Free Resolver
If you are configuring our free DNS resolvers, you can get the IPs from this page: https://controld.com/free-dns
-
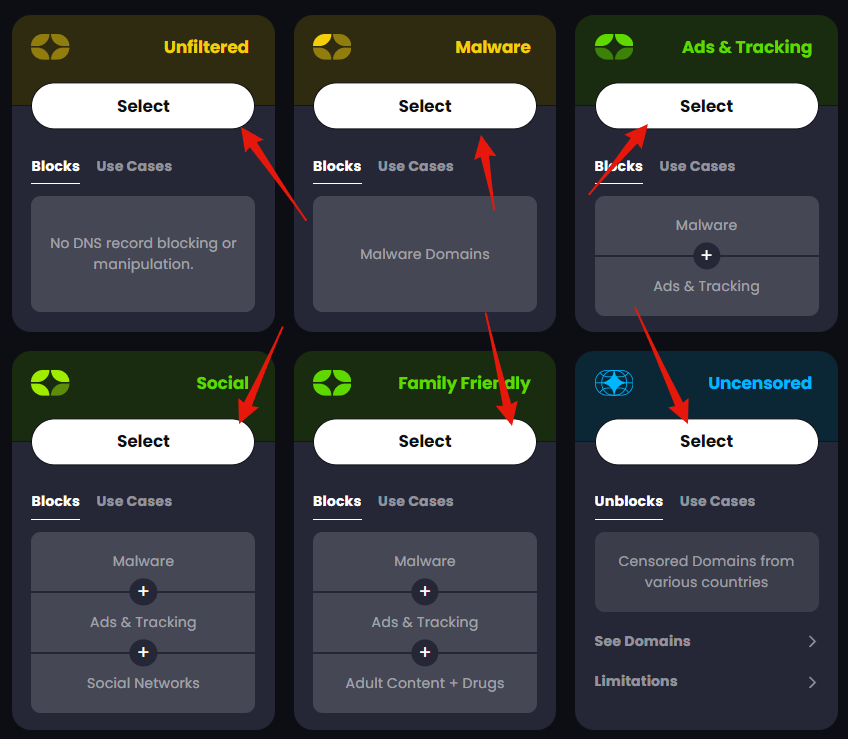
Select the configuration you want to use from the list:
-
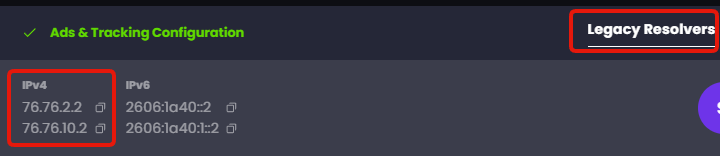
Then copy the Legacy Resolver IP address that appears at the bottom of the page:
Custom Resolver
If you are configuring a custom Legacy DNS resolver:
-
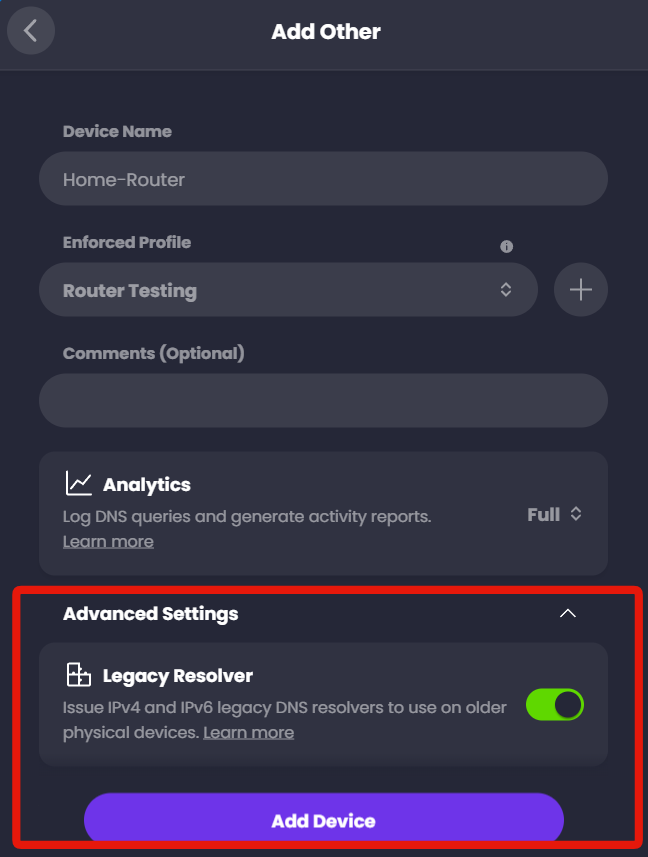
Create a new "Other" Router Device on your Control D Dashboard. Link it to a Profile (or create a new Profile if you don't have one) and finally make sure to enable the Legacy Resolver option under Advanced Settings. Then press Add Device:
-
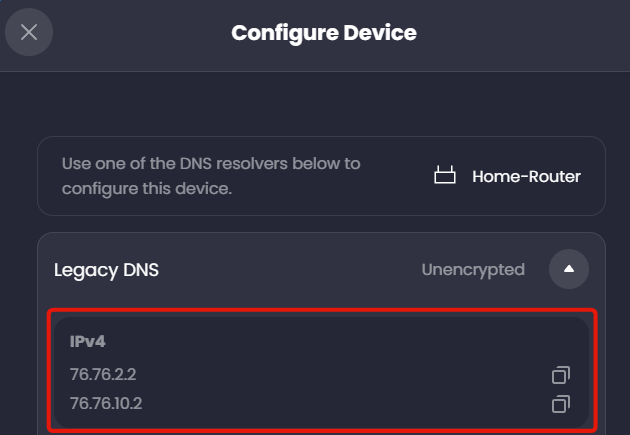
Expand the Legacy DNS section where you will see the IP addresses to use for the setup. Do NOT copy the same IPs from the screenshot, copy the ones from your account specifically.
Step 5
Once you have selected the DNS IP you want to use, you can enter it in the Primary and Secondary DNS fields.
Step 6
Finally, press Apply near the bottom of the page.
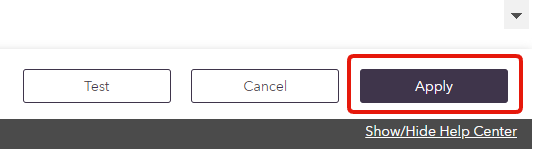
Once the router saves the configuration, you are using Control D on your network!
Keep in mind that if you configure a custom DNS on any of the individual devices connected to this router, those devices will not be using the DNS you configured here.
Dynamic IP WarningThis method is subject to your source IP being registered on this Device in the web control panel, so this is best suited for networks with a static IP. If you have a Dynamic IP see Legacy DNS limitations section for solution.
Updated 8 months ago