
SSO: OIDC with EntraID
This guide walks you through the steps to configure Single Sign-on using OIDC with Microsoft EntraID.
Prerequisites
Before you begin, ensure you have admin access to your EntraID dashboard.
Step 1: Set Up an Application for Control D
-
Log in to your Azure Portal.
-
Navigate to App registrations and click New Registration.
-
Fill in the application details:
Field Data App Integration Name Control D Logo (Optional) 
Redirect URI https://controld.com/sso/callback?provider=microsoftRedirect URI Platform Web
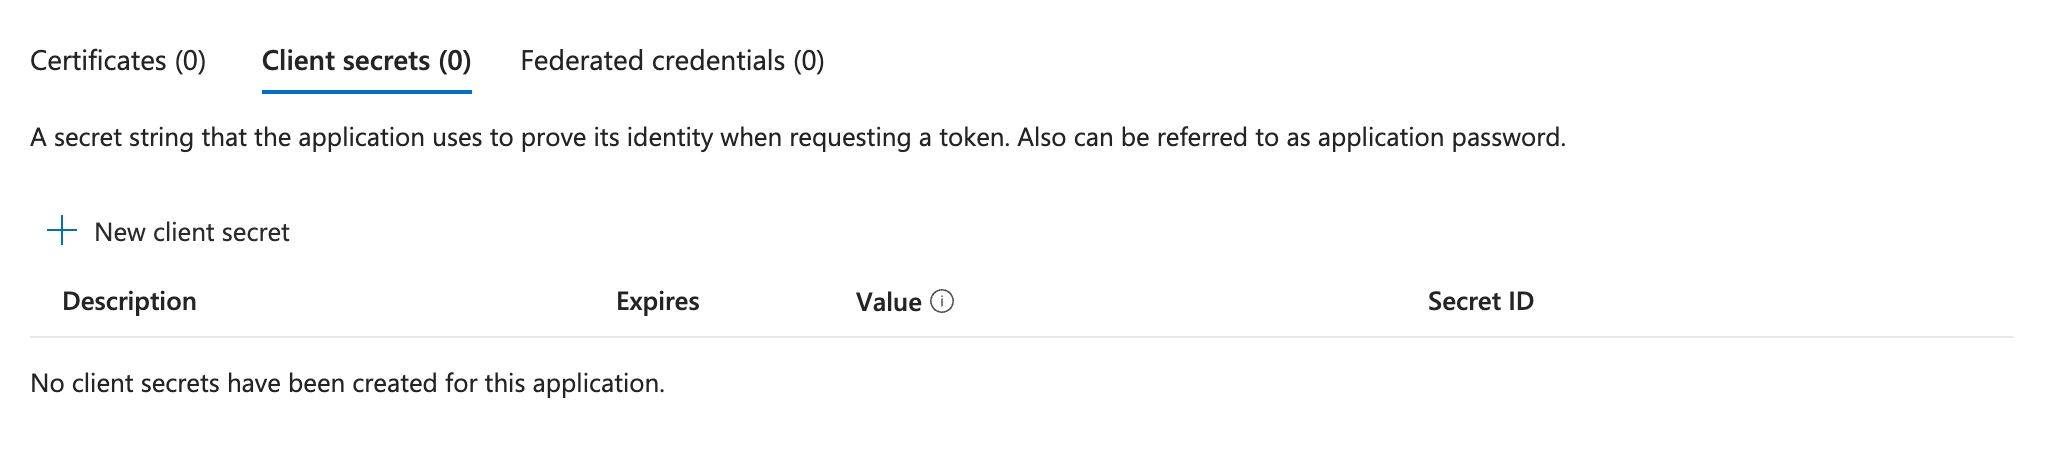
Step 2: Configure client credentials
-
Open the newly created Control D application in App Registrations.
-
Go to the Certificates & secrets tab then to Client Secrets and click New Client Secret.
-
Add the name Control D and click Add
-
Copy the new secrets Value property and store securely, you will need it in later steps.
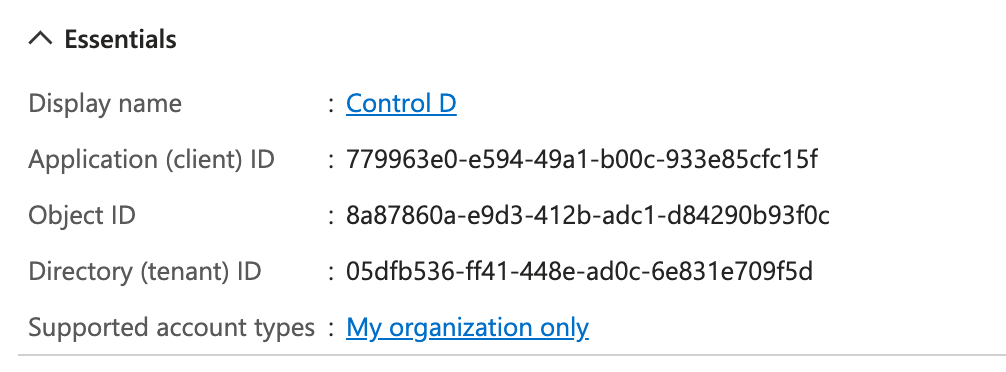
Step 3: Collect Application details
-
Navigate to the Control D application overview page. App registrations, then Control D
-
Note the Application (client) ID and Directory (tenant) ID values.
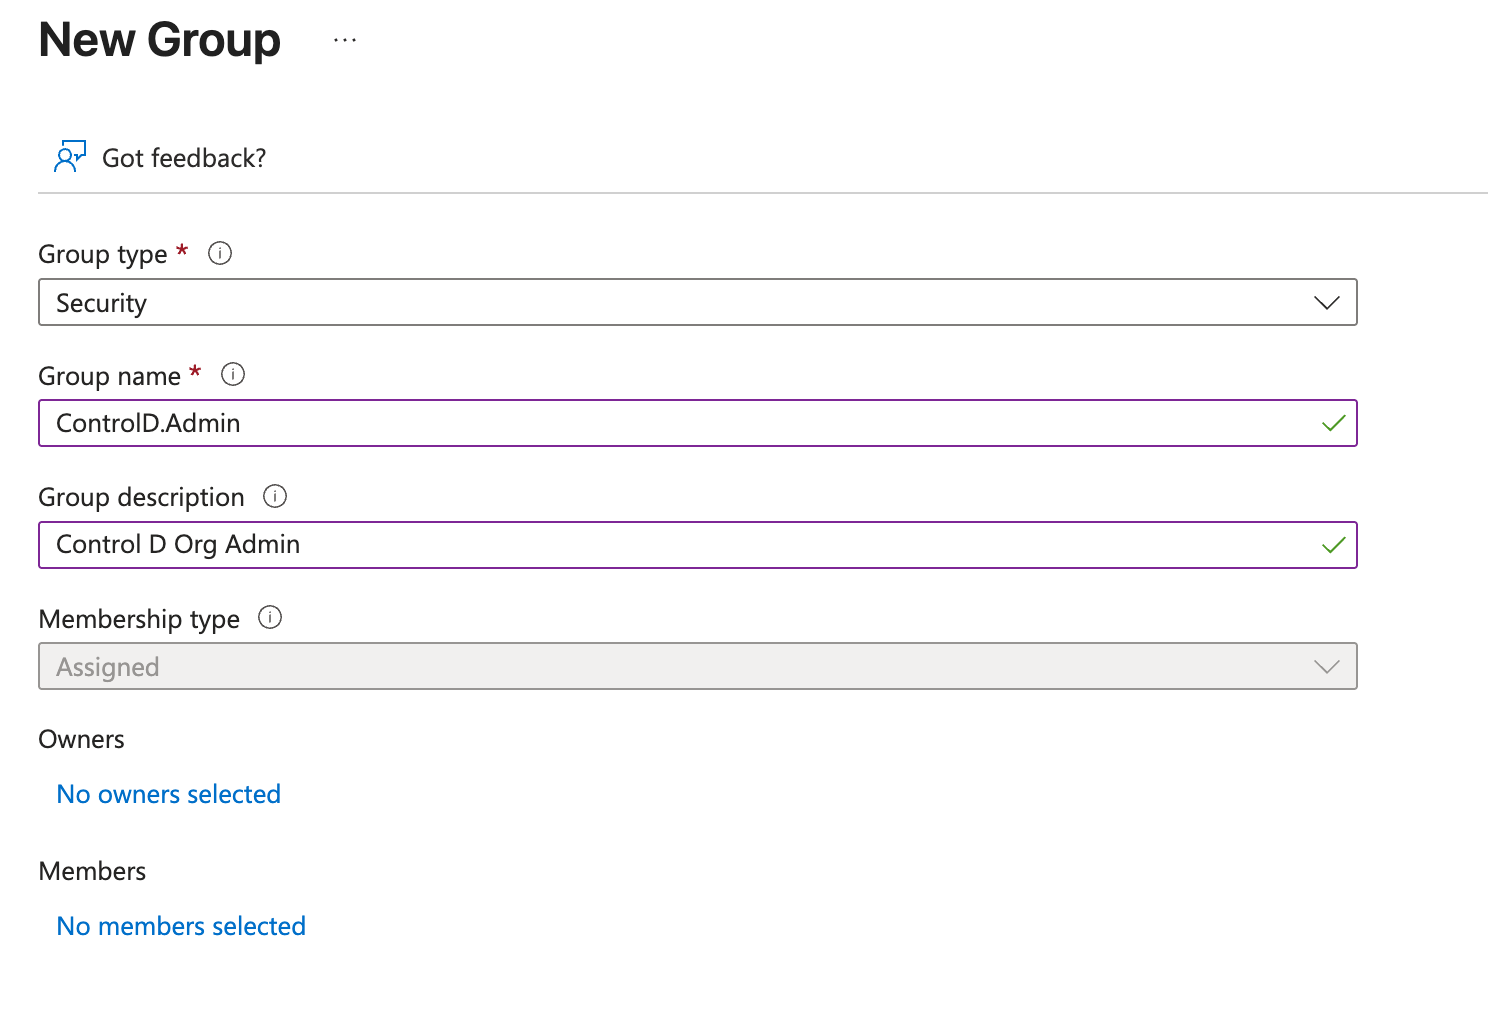
Step 4: Create and Assign User Groups
A feature to support custom group mappings is under way!
-
Go to Groups > New Group from your Microsoft portal home screen.
-
Create three groups for Control D access:
controld-adminorControlD.Admincontrold-ownerorControlD.Ownercontrold-viewerorControlD.Viewer
-
Assign users to these groups based on their roles and responsibilities within Control D.
Learn about the different roles and permission levels here: https://docs.controld.com/docs/org-members-permissions#permission-levels
Step 5: Set Application Group Claim
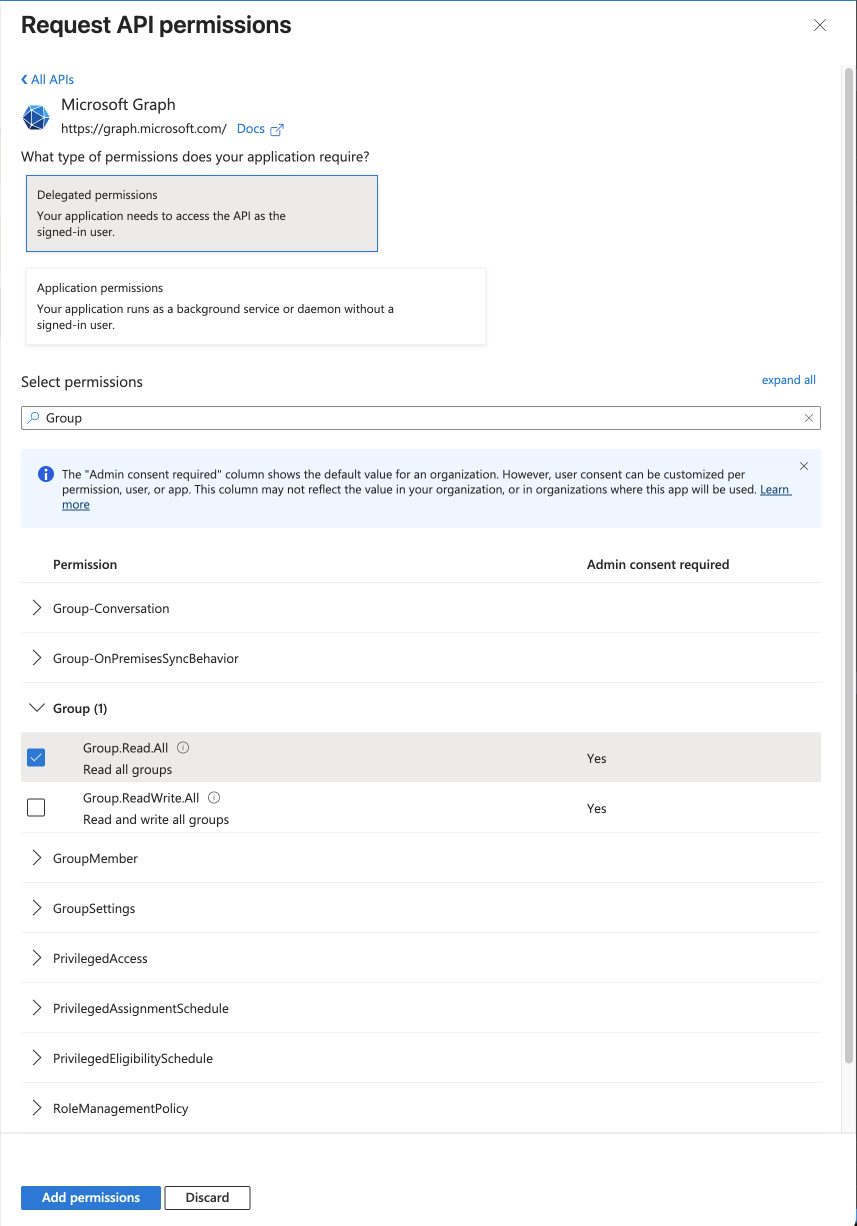
- Navigate to App registrations, select Control D then API Permissions
- Click Add Permission
- Select Microsoft Graph then Delegated Permissions
- Search for Group
- Select Group.Read.All then click Add Permission
- You will now need to grant admin consent by selecting the new Group.Read.All permission from the list, then click Grant Admin Consent next to the Add Permission button.
- Click to Yes in the dialog popup to confirm Admin consent
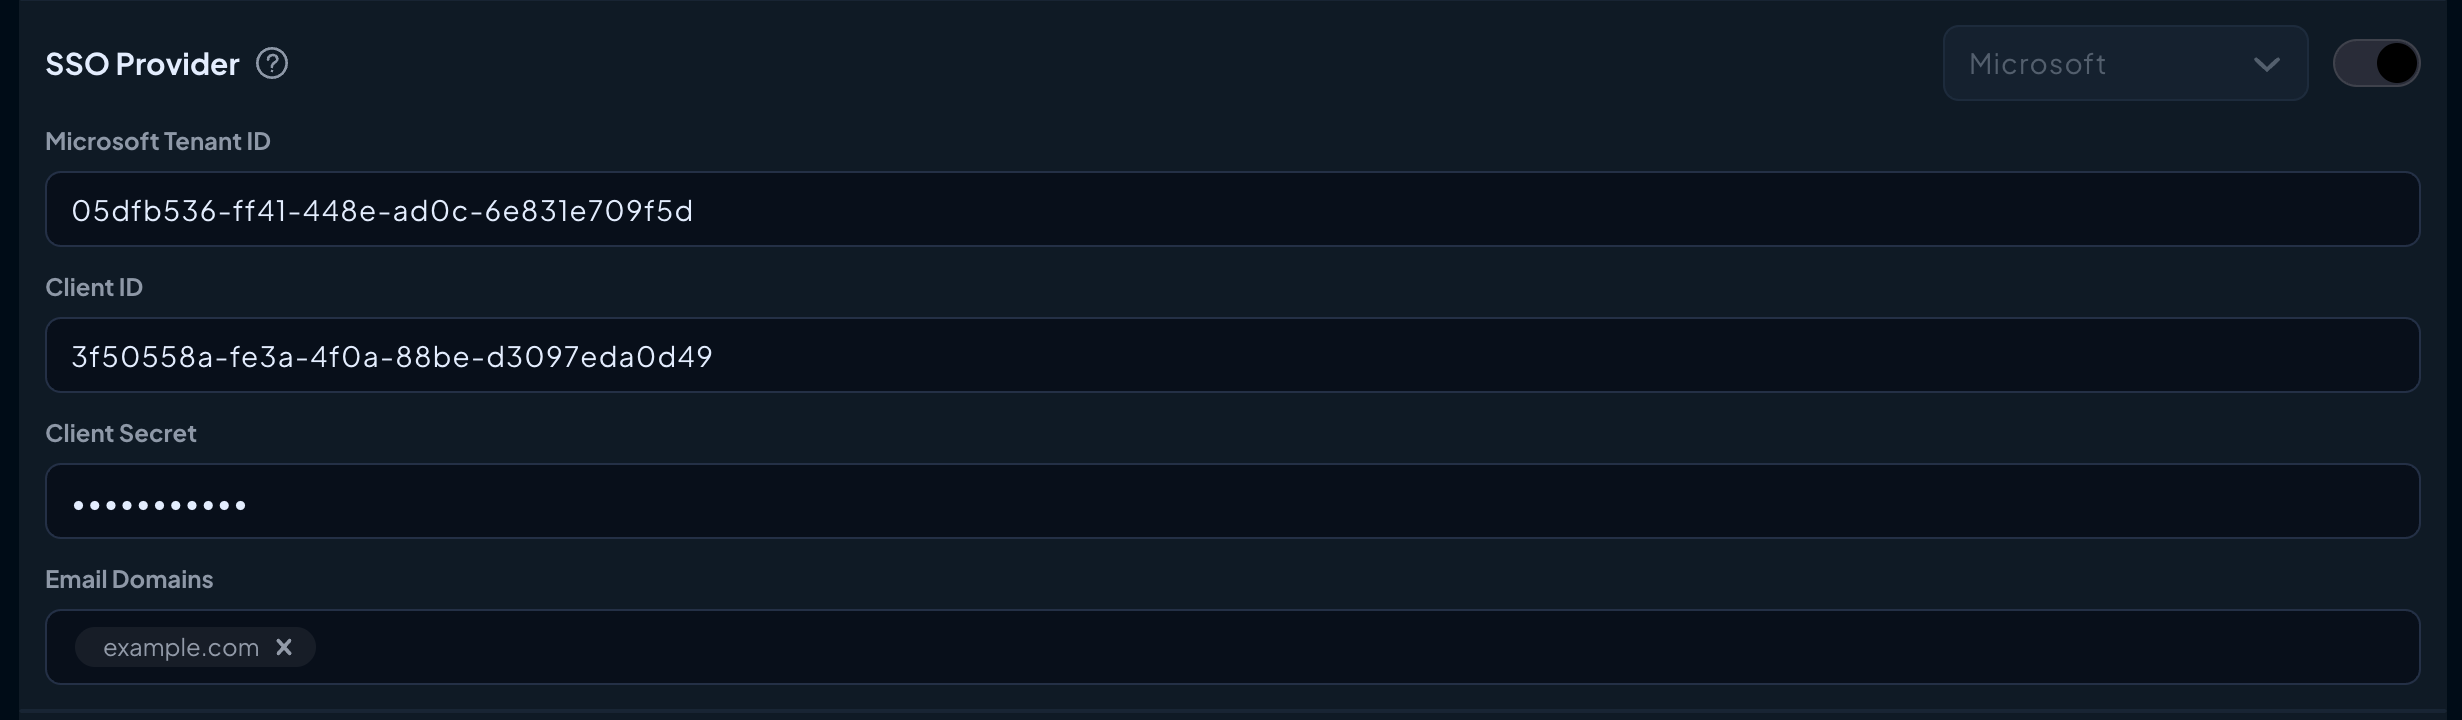
Step 6: Add SSO Configuration in Control D
-
Log in to the Control D.
-
Navigate to My Organization, scroll to SSO Provider, and select Microsoft.
-
Fill in the required fields:
- Microsoft Tenant ID: The value from previous steps
- Client ID: The value you copied from the application.
- Client Secret: The value you copied from the application client secrets tab.
- Email Domains: Enter the domains associated with your organization, e.g.,
example.com. This is necessary to map email domains to your Control D customer account so that login attempts are redirected to the correct Microsoft tenant authentication server.
-
Click Save to enable EntraID SSO for your organization.
Step 7: Test SSO Login
- Log out of Control D and navigate to the login page.
- Enter your Microsoft Organizations email address, leaving the password blank.
- Click the Log in with SSO button.
- You will be prompted to login to your Microsoft account.
- Verify role-based access permissions by testing users in the
controld-admin,controld-owner, andcontrold-viewergroups.
Troubleshooting
If you encounter any issues:
- Verify the Redirect URI in your App Registration settings.
- Ensure the user groups are correctly assigned in the Microsoft panel.
- Check the SSO configuration in the Control D Admin Panel for typos or missing fields.
- Refer to the Microsoft logs for debugging SSO errors.
For additional support, contact Control D Support.